![LOGO_WV-1.png]](https://help.martianlogic.com/hs-fs/hubfs/LOGO_WV-1.png?height=40&name=LOGO_WV-1.png)
First, you must grant the user access:
Step 1.
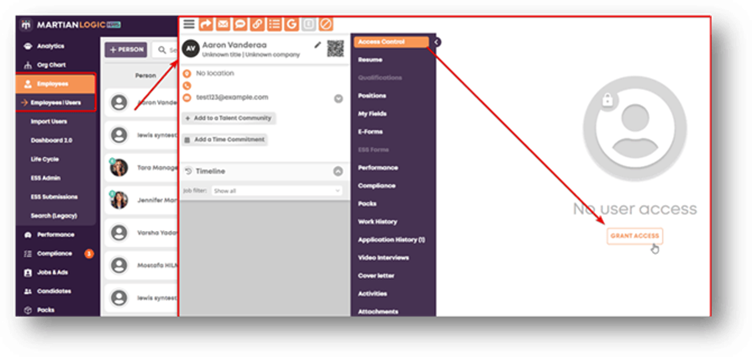
Find the employee you'd like to grant access to in the employees/users list.
Open their profile and select 'Grant Access' from the Access Control Tab
Step 2.
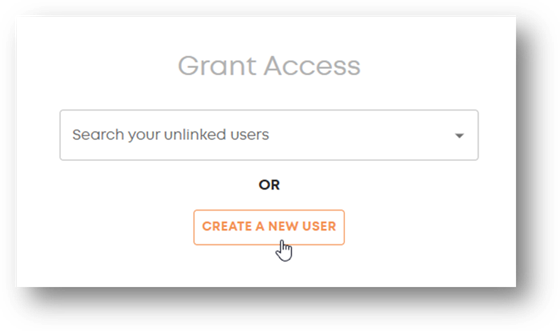
Select 'Create New User'
Step 3.
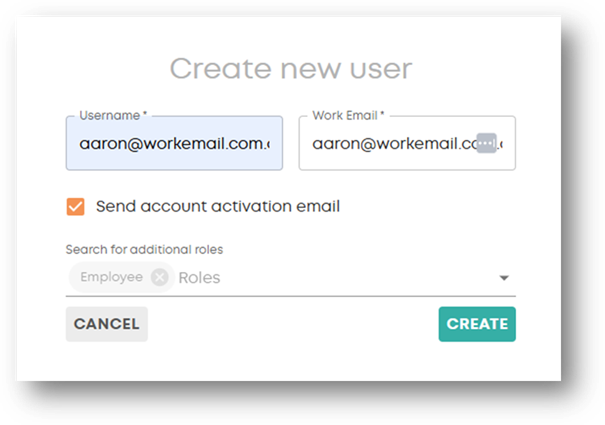
Create a username and enter the work email. Select 'Send activation email' and select the employees access level via the drop down. Refer to the above permission definitions if you are unsure of what to grant employees. Select 'Create'
NOTE: The username can be whatever you'd like, however best practice is to use the same format for all usernames. The most commonly used usernames is the work email.
Once you have granted the access, you will see a menu appear. This menu allows you to revisit any of the access details for the user and amend when needed.
NOTE: Even if you have offboarded an employee, you will still need to deactivate their profile from the access control menu within their employee profile.
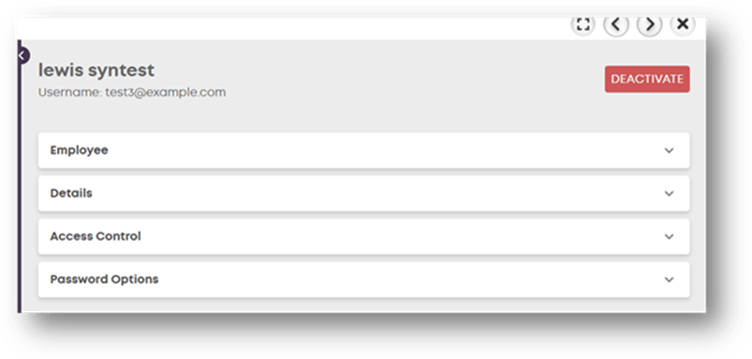
Employee Profile / Access Control Menu
- Details: Stores basic personal and contact information.
- Name / Surname / Email: Core identity fields required for profile creation and system communications.
- Role / Phone / Mobile / Fax: Optional contact details and job classification within the organization.
- Access Control: Manages system permissions and data visibility.
- Global Role: Controls general platform privileges (currently assigned as Employee via the Assign Role button).
- Buckets: Restricts or grants access to specific data groups or organizational units using Assign To Bucket.
- Password Options: Controls login credentials and security settings.
- Password / Confirm Password: Set or manually overwrite the user's password.
- Password Expiration days: Set the timeframe before a mandatory password reset.
- Force user to change password on next login: Requires a credential update upon the user's next sign-in.
- Resend Activation Email: Triggers a system email allowing the user to activate their account or set up credentials independently.
Once your user has been granted access, you can assign Single Sign On:
Step 4.
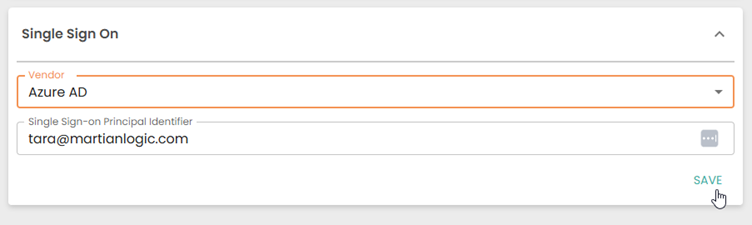
Drop down the Single Sign On menu and select your vendor.
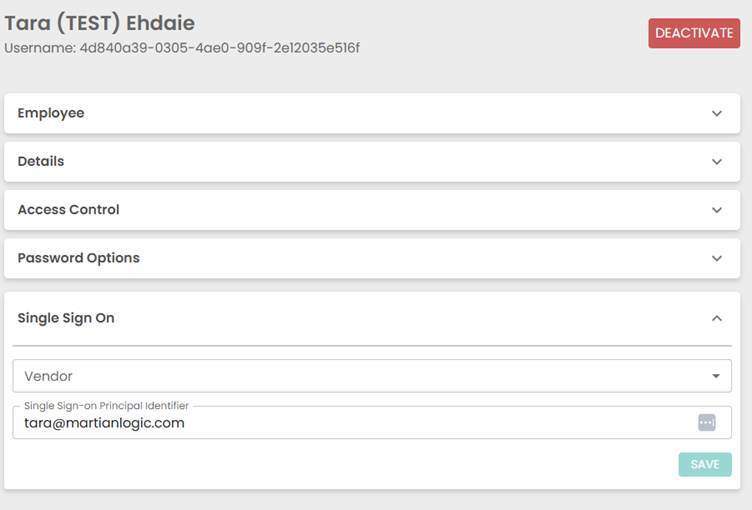
Step 5.
Enter the UPN/Single Sign On Principal Identifier
NOTE: the username of the employee cannot be changed once created, however the UPN can be. If you change the email within single sign on, the username does not need to be amended and employees can log in using this email.
Step 6.
Select 'Save'