![LOGO_WV-1.png]](https://help.martianlogic.com/hs-fs/hubfs/LOGO_WV-1.png?height=40&name=LOGO_WV-1.png)
OPTION A. BULK METHOD
Step 1.
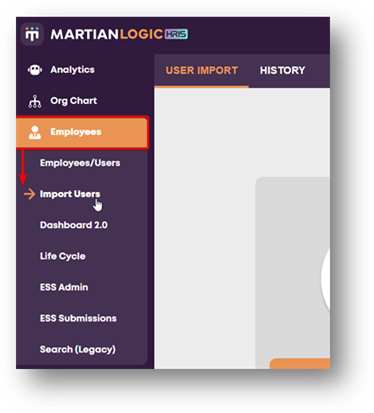
Select 'Import Users' from the Employees/Users Menu
Step 2.
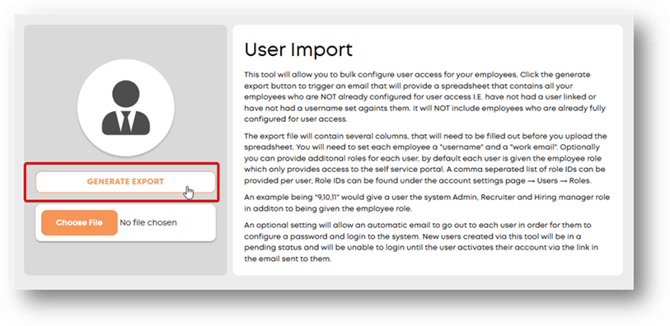
Select 'Generate Export'
Step 3.
An exported list will be sent to your email address, in excel format. Open the spreadsheet and create usernames for your employees.
NOTE: The export will only generate employees who do not currently have access
NOTE: This is generally the work email in the spreadsheet. You can copy and paste this list into the 'Username' column.
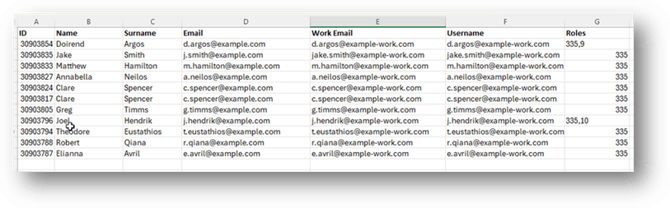
In the 'Roles' column, assign the code associated with the access you'd like to grant employees. Below is a list of the codes, as well as the definition of their associated permission.
NOTE: Some employees may have multiple access levels. E.G. employee & admin.
If an employee already has admin access, the role entered into the spreadsheet will just add onto their existing permission. However, if they have not yet been granted access - ensure all roles are entered in the following example format:
335,9
(no spaces)
CODES/DEFINITIONS
- 10 - Recruiter
See all jobs and all candidates, and can initiate requests to hire and post advertisements. Can onboard and complete all aspects of the recruitment workflow. - 11 - Hiring Manager
Can only see jobs they initiated and put through the request to hire. Can only see/action candidates associated with jobs they initiated. - 50 - HR
Same as recruiter, however they can see all employees, not just candidates. - 51 - Collaborator
Automatically assigned to people you have shared applicants or approval workflows to. Can approve and view from an external browser but can't log in. - 9 - Admin
All permissions/everything - 335 - Employee
Access to the self-service portal only
Step 4.
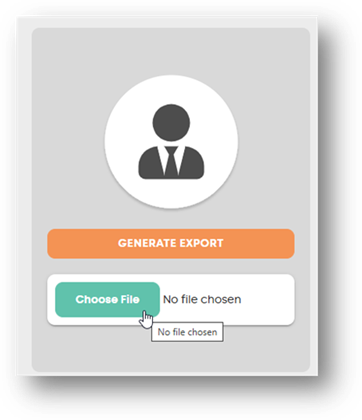
Once you are happy with your spreadsheet, import it back into the system by selecting 'Choose File'
Step 5.
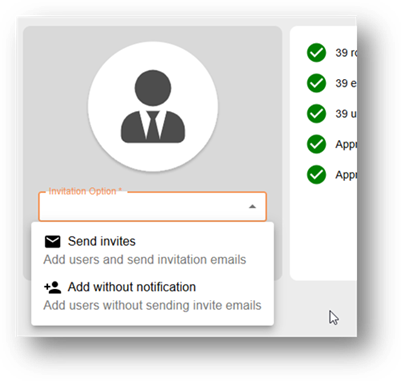
Select your invitation option.
Send Invites - This will trigger activation emails to be sent to all users in the spreadsheet to activate their Martian Logic account.
Add without Notification - This will grant the users access, without sending them the email. They will only be able to log in if they have a link to self service.
Step 6.
Once you have selected your invitation option, select 'Start Import'
You will then receive an email once the import has completed.
OPTION B. INDIVIDUAL METHOD
Step 1.
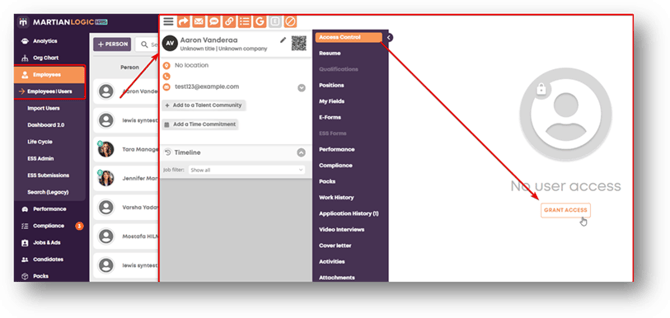
Find the employee you'd like to grant access to in the employees/users list.
Open their profile and select 'Grant Access' from the Access Control Tab
Step 2.
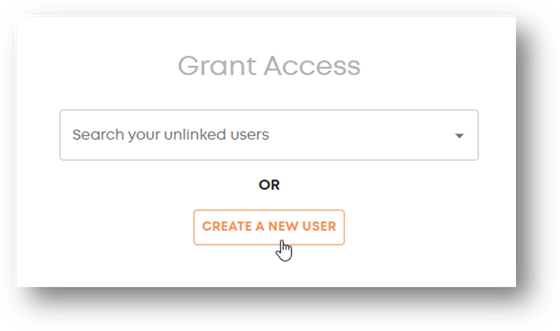
Select 'Create New User'
Step 3.
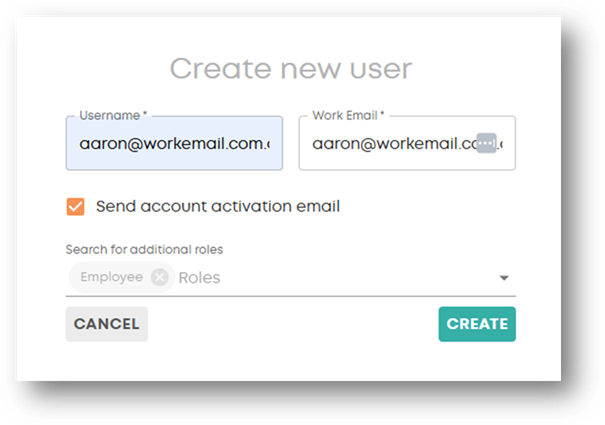
Create a username and enter the work email. Select 'Send activation email' and select the employees access level via the drop down. Refer to the above permission definitions if you are unsure of what to grant employees. Select 'Create'
NOTE: The username can be whatever you'd like, however best practice is to use the same format for all usernames. The most commonly used usernames is the work email.
Once you have granted the access, you will see a menu appear. This menu allows you to revisit any of the access details for the user and amend when needed.
NOTE: Even if you have offboarded an employee, you will still need to deactivate their profile from the access control menu within their employee profile.
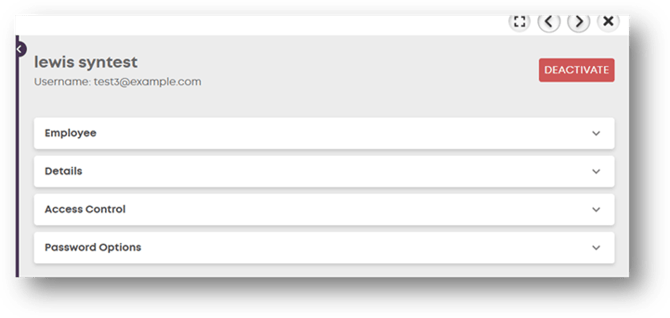
Employee Profile / Access Control Menu
- Details: Stores basic personal and contact information.
- Name / Surname / Email: Core identity fields required for profile creation and system communications.
- Role / Phone / Mobile / Fax: Optional contact details and job classification within the organization.
- Access Control: Manages system permissions and data visibility.
- Global Role: Controls general platform privileges (currently assigned as Employee via the Assign Role button).
- Buckets: Restricts or grants access to specific data groups or organizational units using Assign To Bucket.
- Password Options: Controls login credentials and security settings.
- Password / Confirm Password: Set or manually overwrite the user's password.
- Password Expiration days: Set the timeframe before a mandatory password reset.
- Force user to change password on next login: Requires a credential update upon the user's next sign-in.
- Resend Activation Email: Triggers a system email allowing the user to activate their account or set up credentials independently.