![LOGO_WV-1.png]](https://help.martianlogic.com/hs-fs/hubfs/LOGO_WV-1.png?height=40&name=LOGO_WV-1.png)
Step 1.
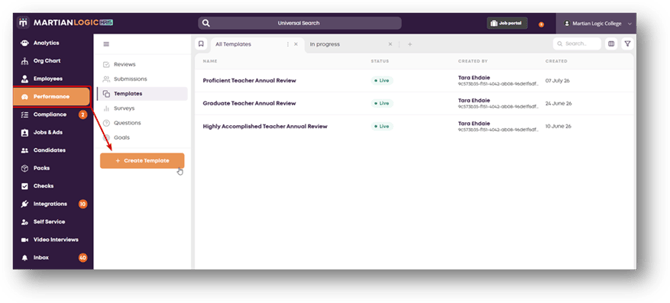
Click on ‘Create Template’ from the left-hand menu within the Performance module.
Step 2.
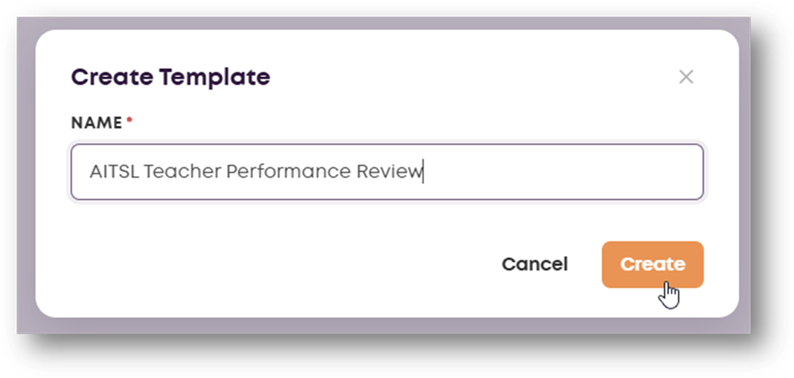
Label your template and click create
Step 3.
The design tab will open, allowing you to begin creating your performance review. You can use the AI feature by entering prompts for your desired template
(See Option A below)
Otherwise, select Topics to begin creating your template from scratch
(See Option B below).
Option A. AI Generate:
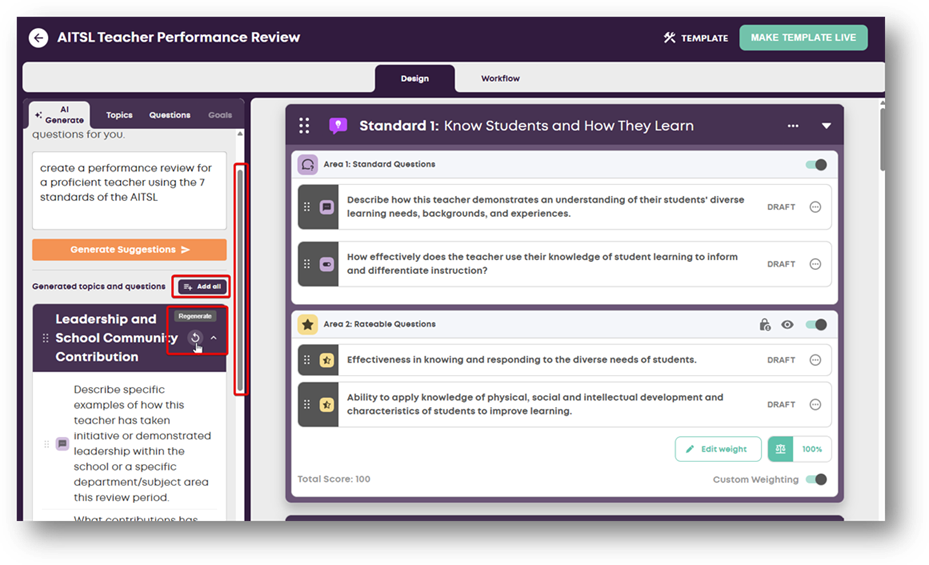
Enter Prompt and Select Generate Suggestions

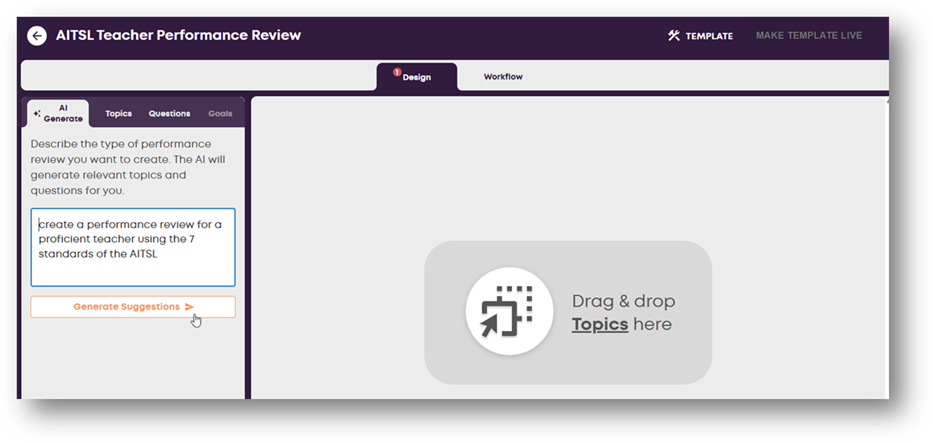
Once suggestions have been generated, select ‘Add all’ or drag and drop the topics you’d like to use into your design tab.
NOTE: You can regenerate suggestions using the regenerate button.
NOTE: Use the bar to scroll down and review the generated suggestions.
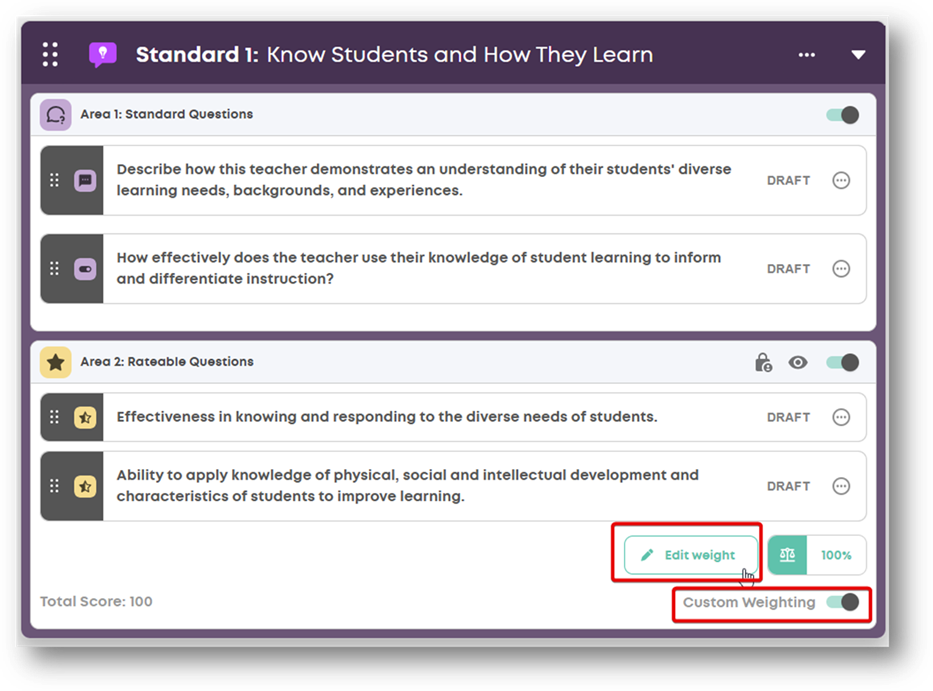
Optional – Custom Weighting.
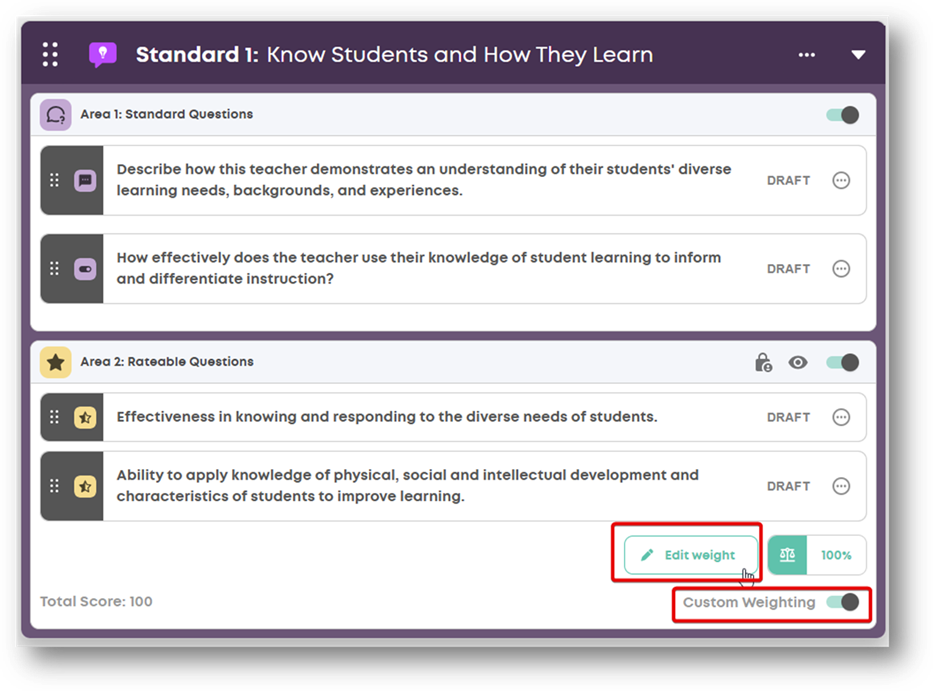
To edit the ‘weight’ of the topics, select Edit Wight from the bottom of the topic. You can then decide to have topics hold more weight than others.
You can also decide to turn the weighting feature off all together by toggling the Custom Weighting off.

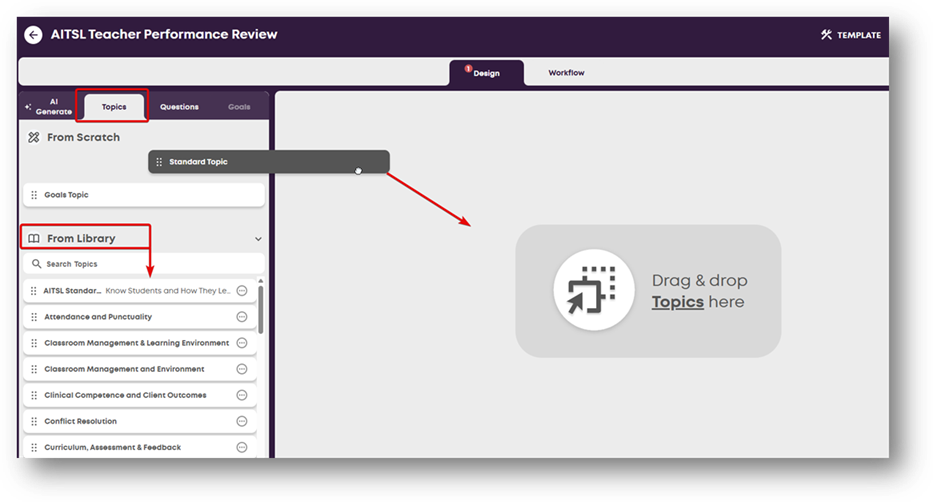
Option B. From Scratch:
Select Topics from the tabs along the top of your design browser and drag/drop a Standard Topic into your design tab.
NOTE: Any topics you have previously made live in prior templates will appear in your library. You can reuse these topics by dragging and dropping them into the design tab.

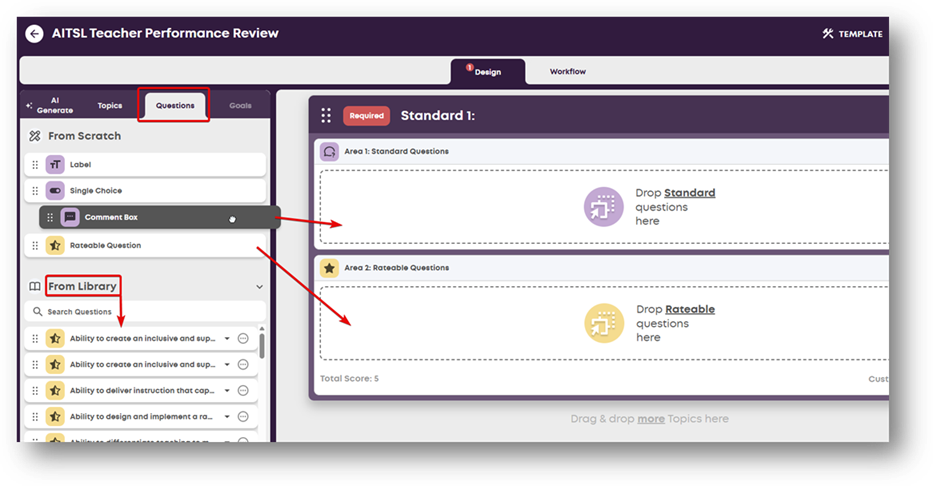
Label your design tab. Begin configuring your questions by entering the Questions tab.
NOTE:
Label – Free floating information/statements. E.g. “Martian Logic College is committed to meeting all AITSL standards. Please answer the questions below regarding your alignment with these standards.”
Single Choice – Questions that have answers that can be chosen from. E.g. Good. Great. Not Good. Neutral.
Comment Box – Questions that allow employees to answer with a comment. E.g. “I feel very supported by my manager”
Rateable Question – Questions with a rating scale e.g. 1. 2. 3 or Satisfactory. Exceeding. Meeting.
NOTE: Any questions you have previously made live in prior templates will appear in your library. You can reuse these questions by dragging and dropping them into the design tab.

Optional – Custom Weighting.
To edit the ‘weight’ of the topics, select Edit Wight from the bottom of the topic. You can then decide to have topics hold more weight than others.
You can also decide to turn the weighting feature off all together by toggling the Custom Weighting off.
Step 4. (Optional)
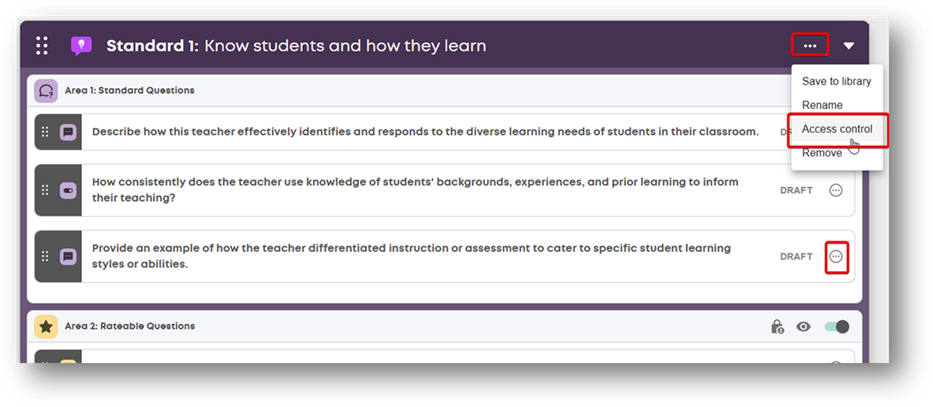
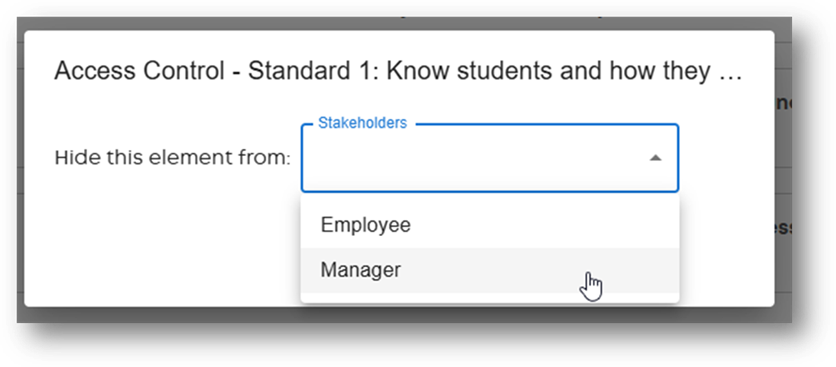
You can enable Access Control by select the three dots on the right-hand side of the topics or questions. This allows you to hide entire topics or certain questions from stakeholders in the process. E.g. You may not want the manager to see how the employee answered a question about their manager. You can opt for this question to be hidden from the manager.
 Step 5. (Optional)
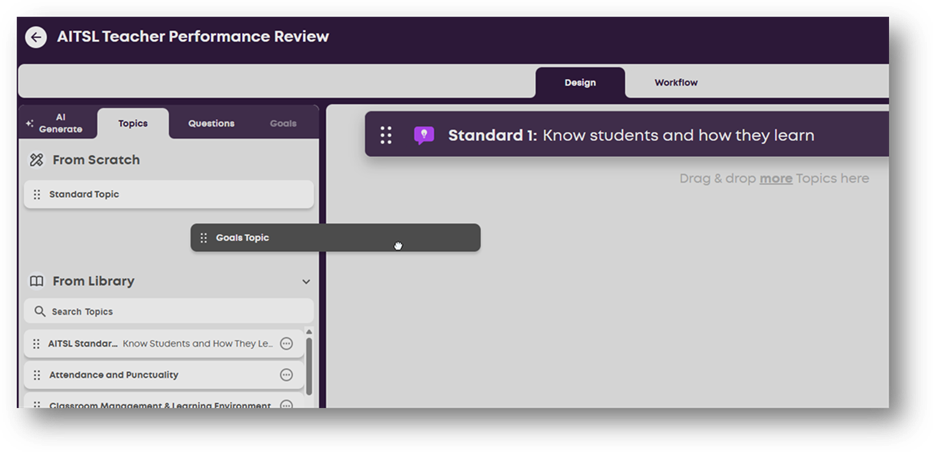
To add goals to your performance review, return to the Topics tab and drag/drop the Goals Topic into your design tab.
Step 5.1.
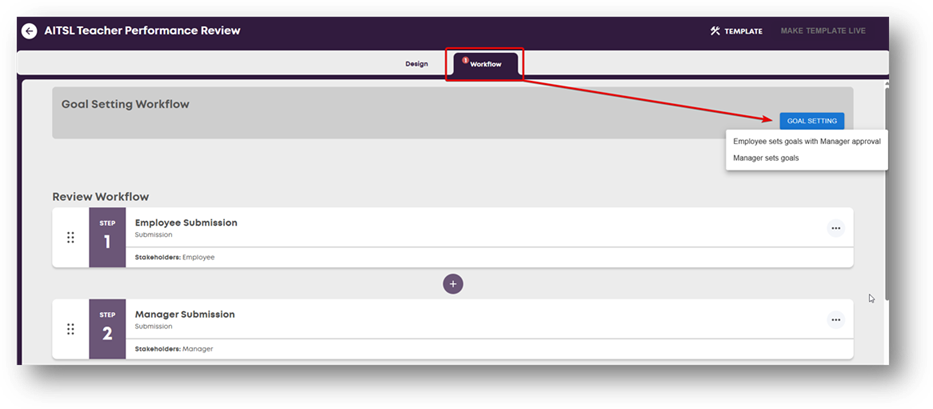
Select the Workflow tab and decide which stakeholder you’d like to set the goals. You can either have the employee set their own goals with their managers approval, or alternatively have the manager set the goals for the employee.
Step 6.
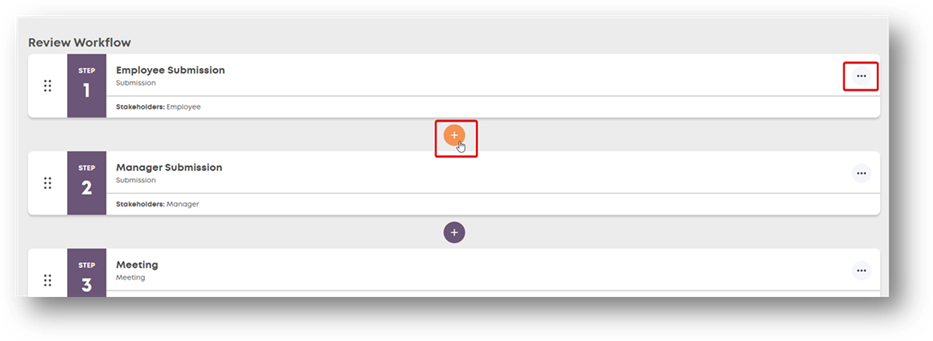
Review your workflow and add in any additional stages you’d like to occur, or remove any stages.
- By default, the workflow after goals have been set (if any have been set) will be for the review to go to the employee for completion.
- Once the employee has completed the questions, it will go to the manager to complete the same questions.
- Once both parties have completed the questions – the system will prompt a meeting to occur by sending an email notifying both parties that the review is ‘Within Meeting’ stage. The meeting is had, whereby the final answers to the questions are reviewed and agreed upon.
- The final answers then go to the employee for acknowledgement.
- Once acknowledged, the review can be ‘Published’ meaning the review will close and be saved to the employee’s profile under ‘Performance’, along with a timeline of each stage, when it occurred, receipt of the employees acknowledgement and who was involved.
To add in additional stages, select the + symbol where you’d like to add in the step
To remove a stage, select the three dots on the right-hand side of the stage.
Step 7.
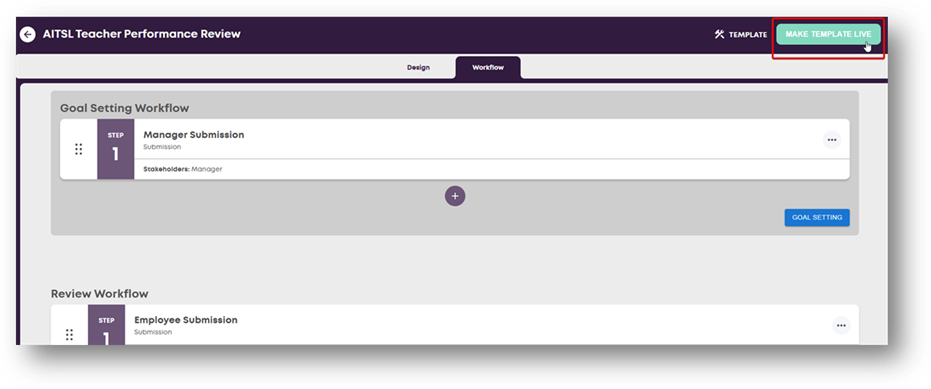
Once you are happy with your design, configuration and workflow of your performance review – make your Performance Review Template live by selecting Make Template Live from the top right of your browser.
Step 8.
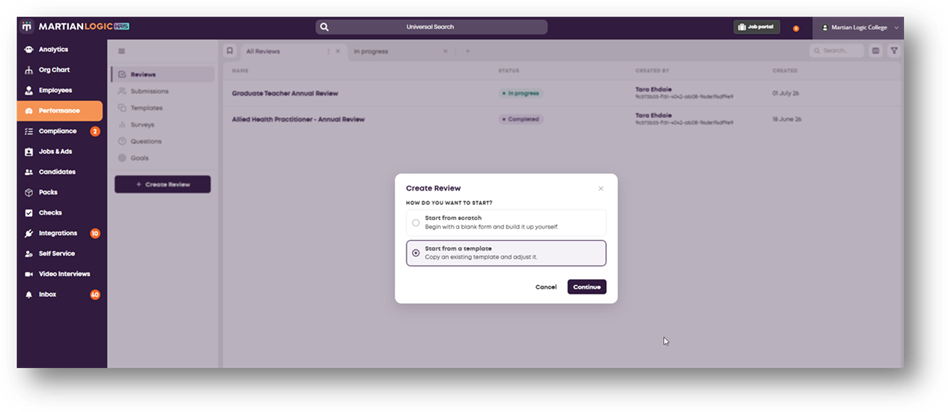
Return to the performance module to begin assigning your performance template to managers and employees. Select Reviews from the top of the menu, Select Create Review, Select start from a template and then click on Continue.
Step 9.
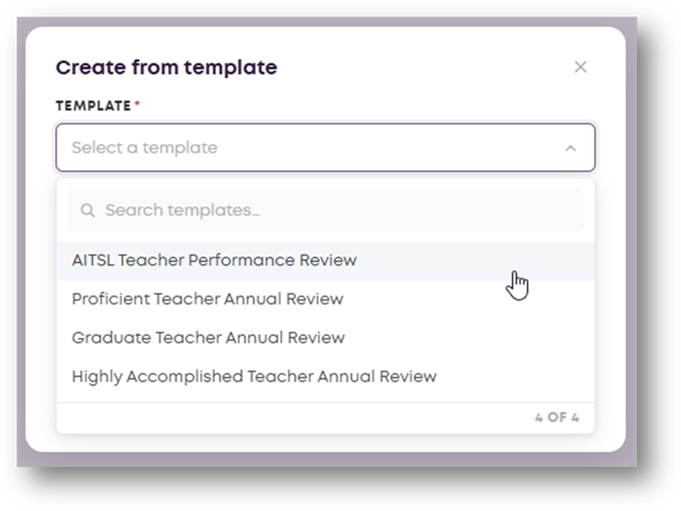
Select your template from the drop-down menu
Step 10.
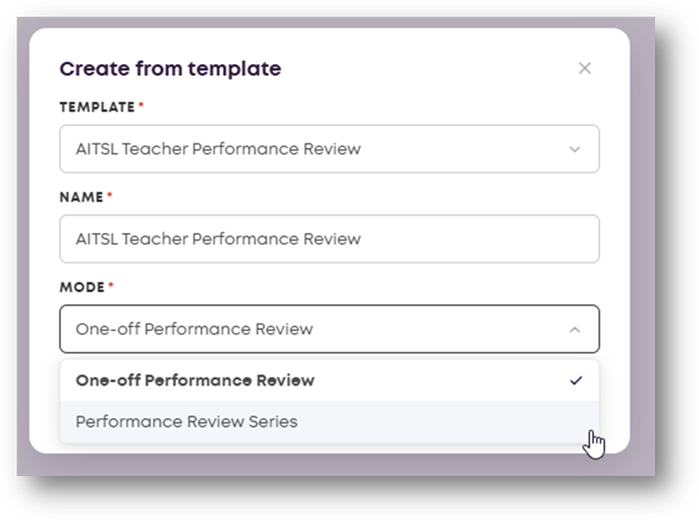
Select the mode you’d like to initiate the performance review.
One-off Performance Review – For reviews that only occur once e.g. annually.
(See Option A for example)
Performance Review Series – For reviews that entail multiple phases/stages to make up the entire review. E.g. 4 quarterly phases to make up 1 annual performance review.
(See Option B for example)
Option A. One-off Performance Review
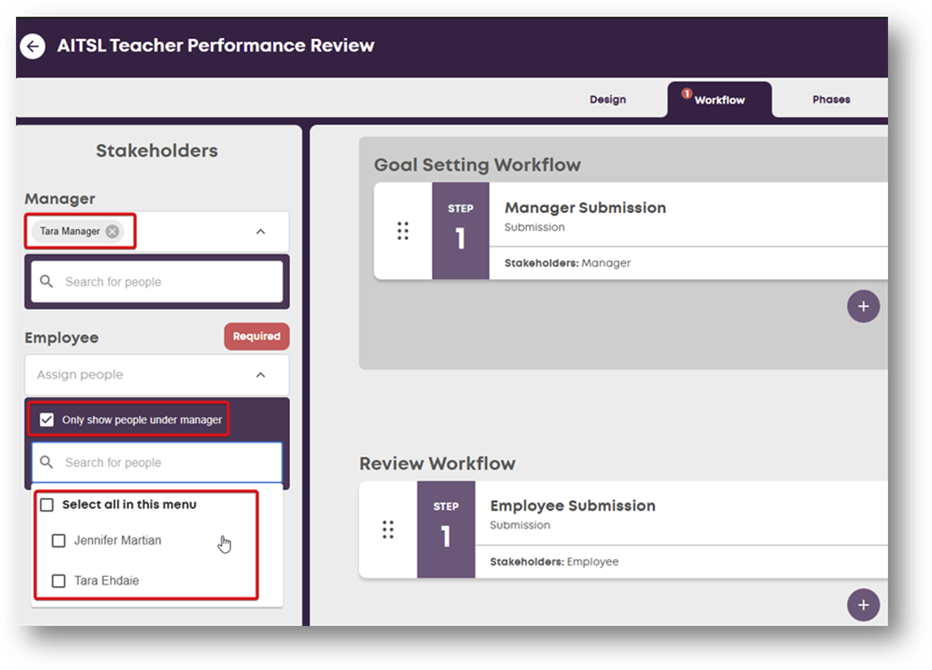
Enter the Workflow tab and assign your managers and employees.
NOTE: you can assign multiple managers and their reporting employees at once. Or you can just assign to one manager and one employee.
NOTE: you can select ‘Only show people under manager’ this will bring up a list of employees reporting to the manager selected, in the org chart.
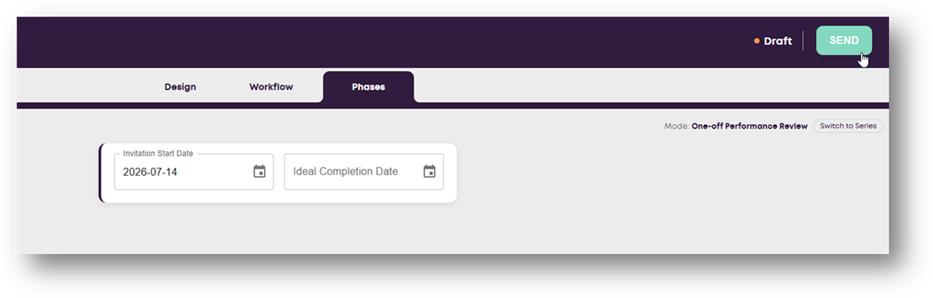
Enter the Phases tab and select what date you’d like invitations to go out to the manager and employees to complete their review. These invitations are sent via email.
Once date has been selected, you can hit send and your review is now in progress.
Option B. Performance Review Series
Enter the Workflow tab and assign your managers and employees.
NOTE: you can assign multiple managers and their reporting employees at once. Or you can just assign to one manager and one employee.
NOTE: you can select ‘Only show people under manager’ this will bring up a list of employees reporting to the manager selected, in the org chart.
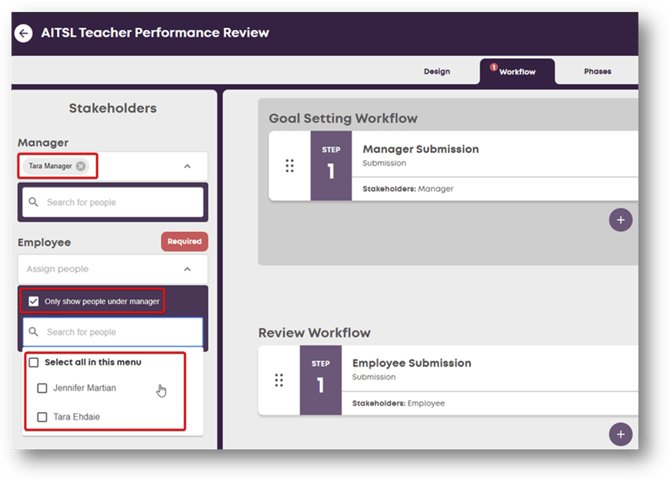
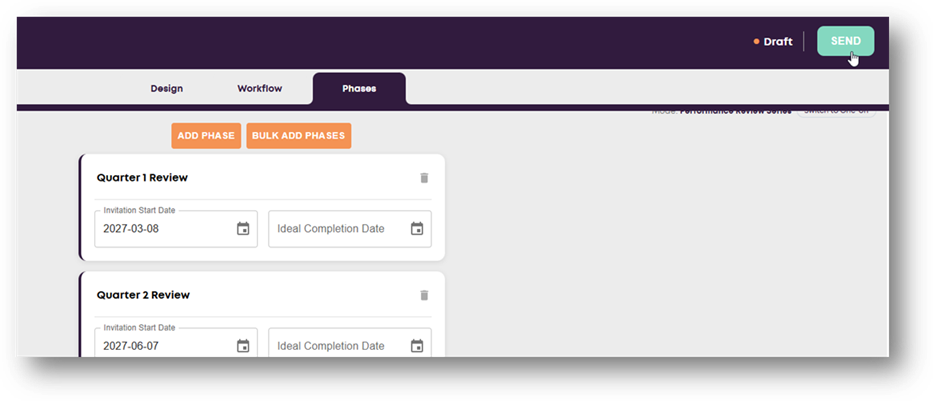
Enter the Phases tab and add your phases. You can use the bulk phases feature for series that occur frequently.
Name your phases, enter the dates you’d like each phase to be initiated and an ideal completion date (optional)
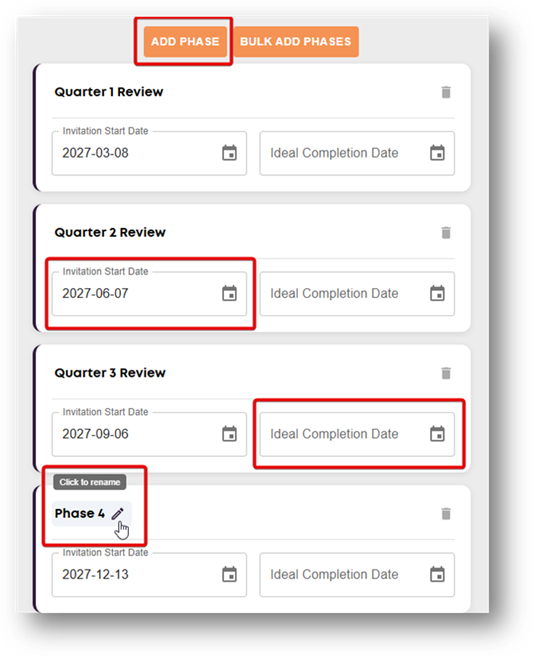
Once all information is entered, you can hit send and your review is now in progress.