![LOGO_WV-1.png]](https://help.martianlogic.com/hs-fs/hubfs/LOGO_WV-1.png?height=40&name=LOGO_WV-1.png)
Phase 1: Build the Compliance Library & Configure Items
Step 1.
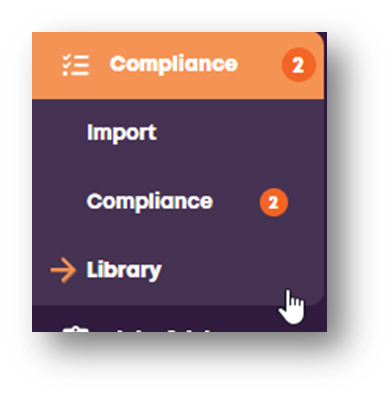
In your current library, click + Compliance Item at the top of the screen.
Step 2.
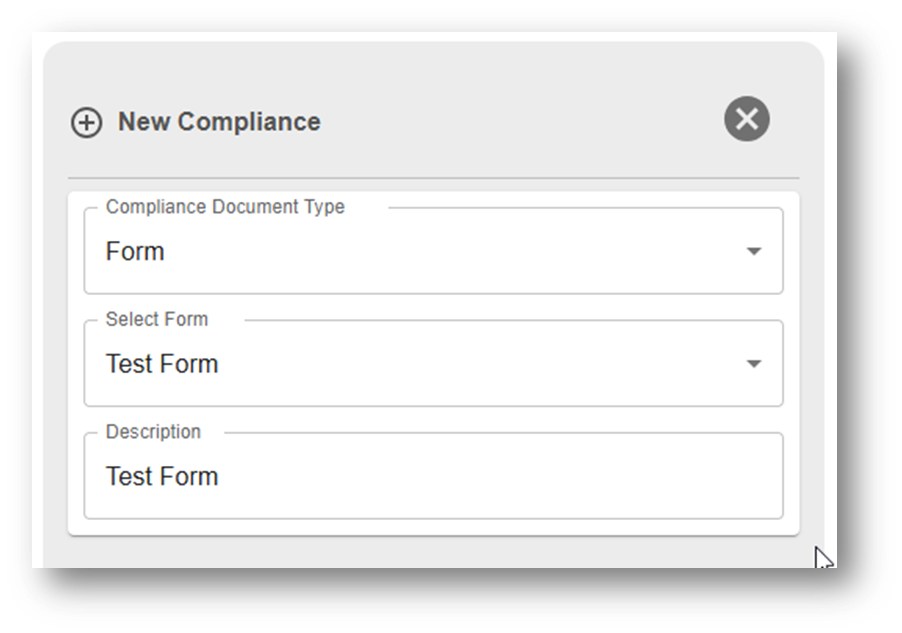
Choose the type of item from the dropdown menu (e.g., Form, Document, Compliance Field, Video, or LMS etc), label it, and save it to add it to your drafts.
(For how to create a compliance field, visit - https://help.martianlogic.com/knowledge-base/how-to-create-a-compliance-field-link-an-item-to-the-compliance-library)
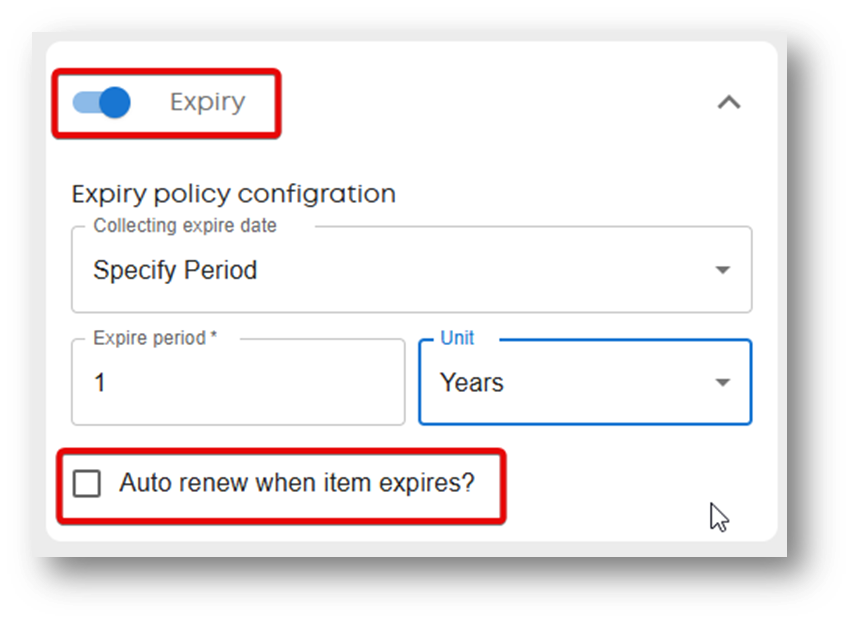
Step 3: Set your expiry rules by clicking Edit on the item to open the Expiry Policy Configuration:
- Specify the duration (e.g., expires one year after the issue date).
- (Optional) Tick Auto-renew when item expires to Active so the system automatically prompts employees to update their records once they expire.
- Click Update.
Phase 2: Create Automated Compliance Reminders
Step 4: Click the three dots on your live compliance item and open the Reminders section.
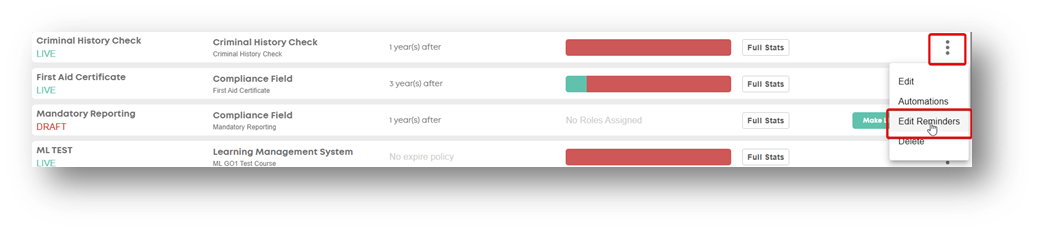
Step 5: Click the Bell Icon to create a new reminder and label your reminder e.g. Reminder 1.
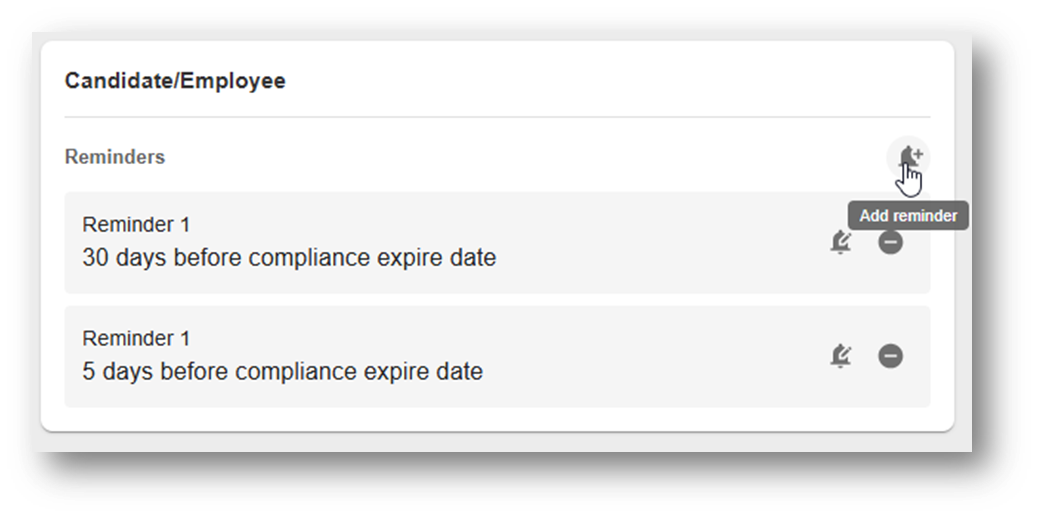
Note: You can set as many reminders as you’d like against an item. E.g. Reminder at 1 day before expiry date, Reminder at 5 days before expiry date etc.
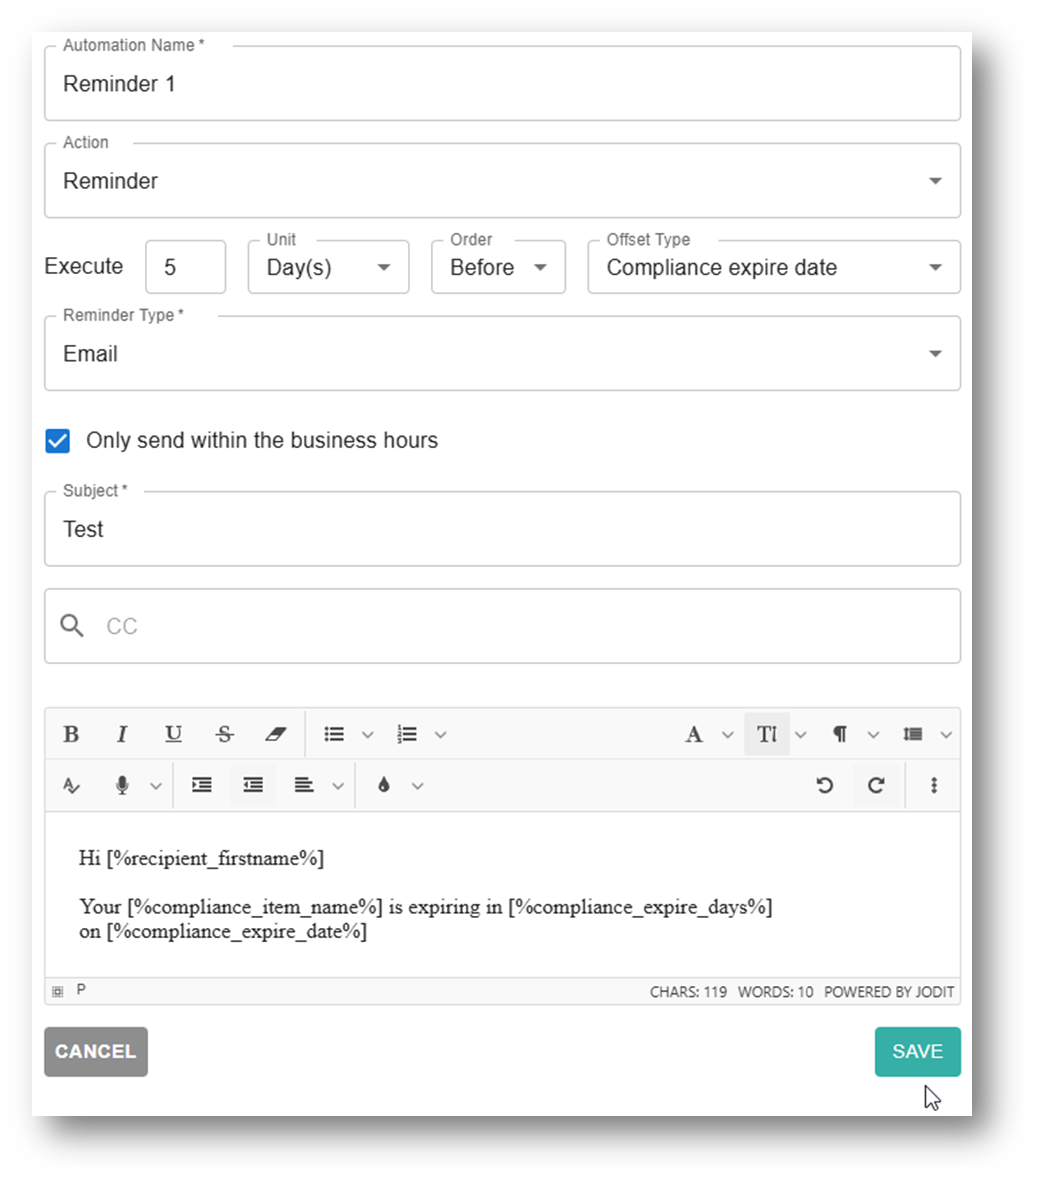
- Action: Set to Reminder.
- Execution: Set the timeline (e.g., 30 days before the compliance expiry date).
- Reminder Type: Select Email or SMS
(SMS is a purchased cost. Speak to your allocated Account Manager for SMS costing) - Subject: Enter a subject line (e.g., Compliance Expiry).
- (Optional) Check the box to Only send within business hours and add any necessary CC recipients.
Step 6: Write the email body using dynamic placeholders (e.g., Hi [Recipient First Name], your compliance item is expiring in [X] days on [Date]) and click Save.
Step 7: (Optional) Click Add Reminder after saving to add additional reminders for closer timelines (e.g., 5 days or 1 day before expiry).
Note: For urgent/last-day reminders, you can select the Direct Manager as a recipient. The system will dynamically pull their reporting line from the org chart to notify them.
Phase 3: Assign Items to Recruitment Packs and Roles
Step 8: Assign items to new hires through Recruitment Packs:
- Navigate to Pack Templates and select a template.
- Add the compliance document directly to the pack or embed it as a field within an existing document.
- (Once completed during recruitment, these files automatically sync to the employee's compliance file).
- (Compliance fields can be added throughout application forms, or other areas of your recruitment workflow)
Step 9: Bulk-assign items to existing staff via the Role Library:
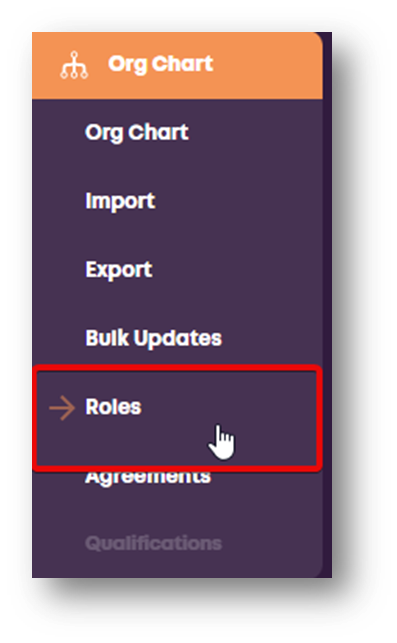
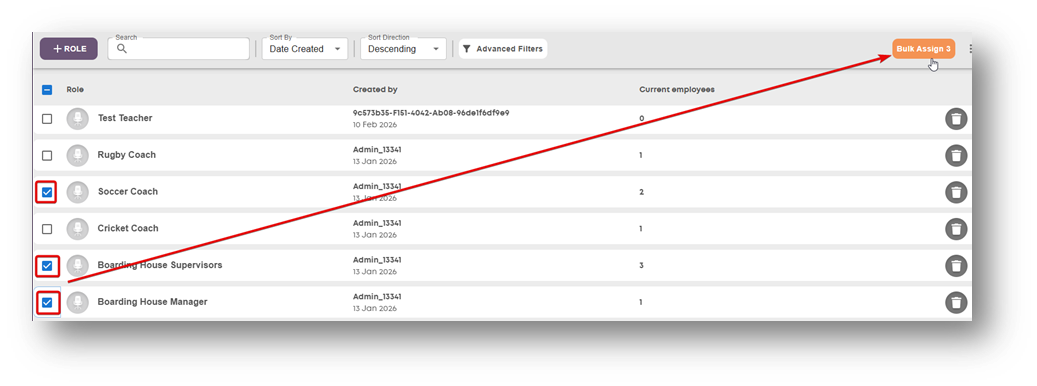
- Select the roles that require the certification (e.g., Science Teacher, Soccer Coach, Boarding House Supervisor).
- Click Bulk Assign.
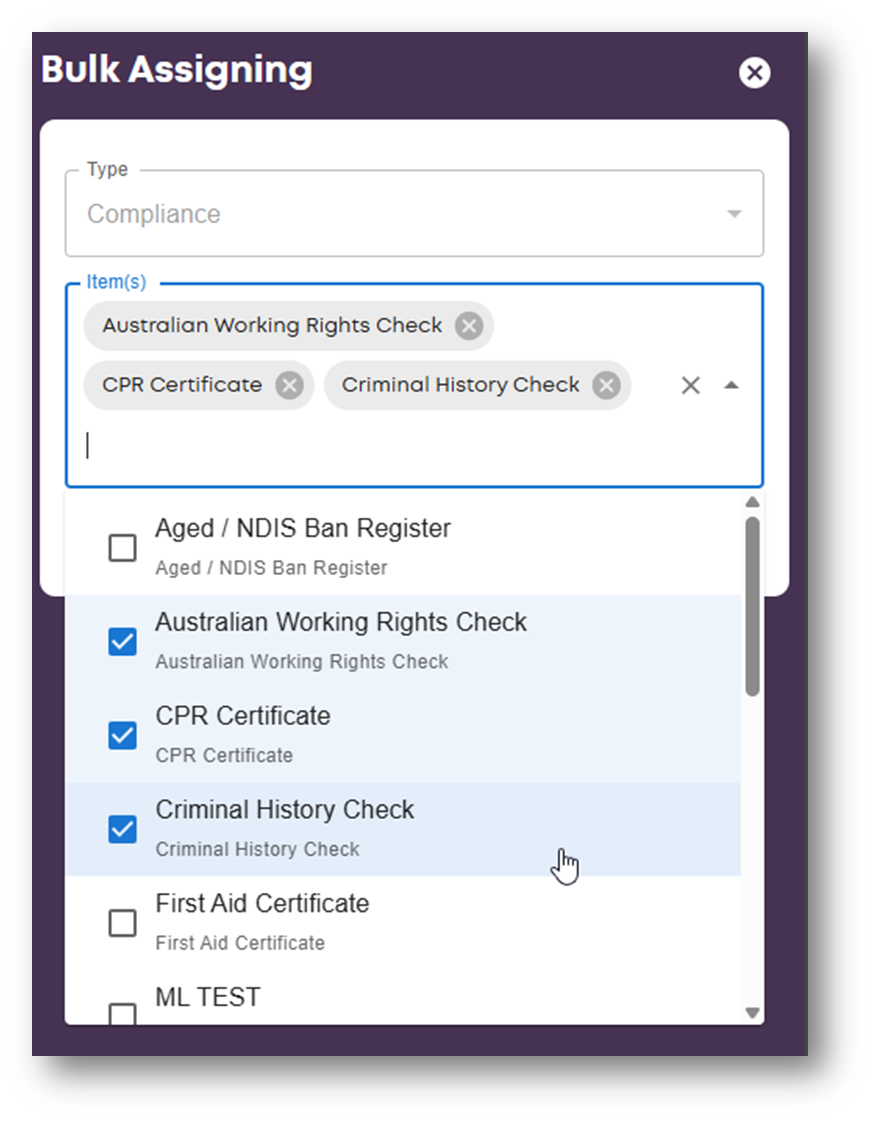
- Select the required compliance items (e.g., CPR Certificate and First Aid).
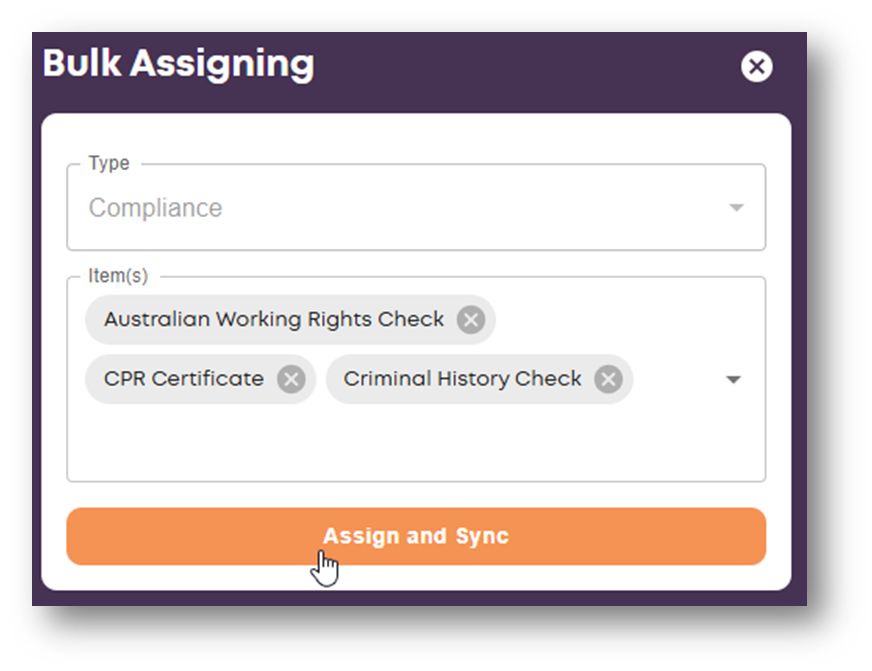
- Click Assign and Sync to link the requirements to those roles.
Note: Once synced, employees within the roles assigns/synced – will receive a notification via email to log into their self service portal and complete their compliance item, if they have not already done so.
Phase 4: Review Submissions & Manage the Workbench
Step 10: Go to the Compliance tab and click the Pending Review button to view employee submissions.
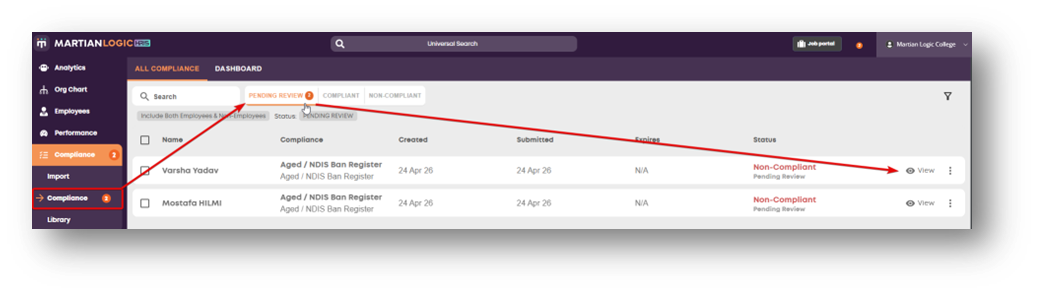
Step 11: Click the View button next to an individual submission to review the uploaded file or photo, then select an action:
- Approve: If the document is correct, click approve to update their status.
- Decline: If the file is incorrect or blurry, click decline and add your notes. (This bounces the task back to their self-service portal for a re-upload).
Step 12: Track your organization's overall status using the Workbench:
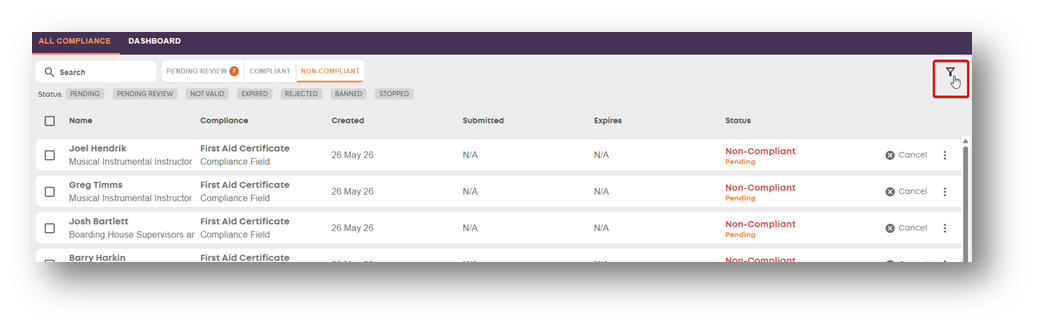
- Filter or view lists broken down by categories: Compliant, Non-Compliant (Pending), Rejected, Expired, Stopped, or Banned.
- Filter by specific criteria (e.g., Subject Teachers) and click Apply to isolate data.
Phase 5: Monitor Compliance Dashboards and Insights
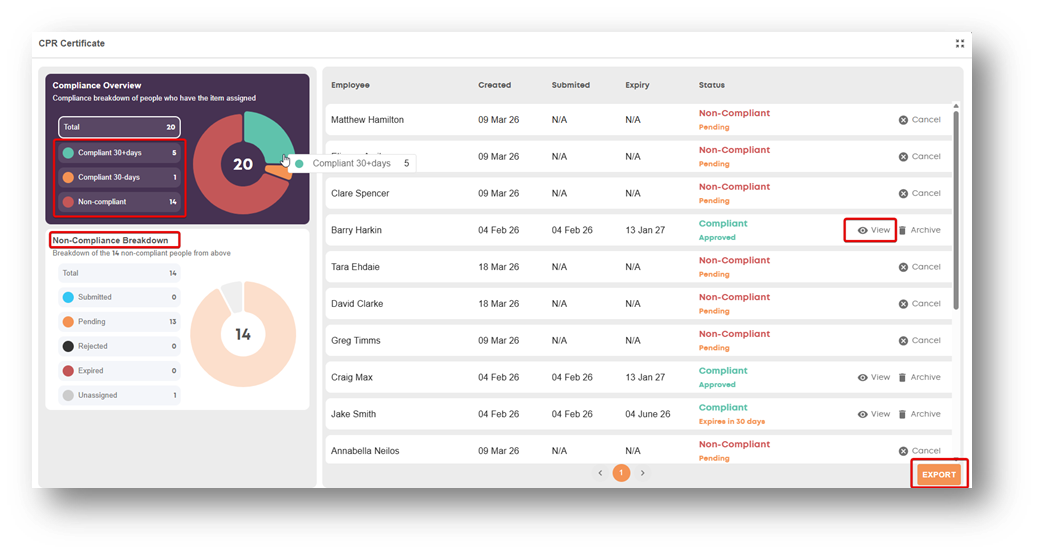
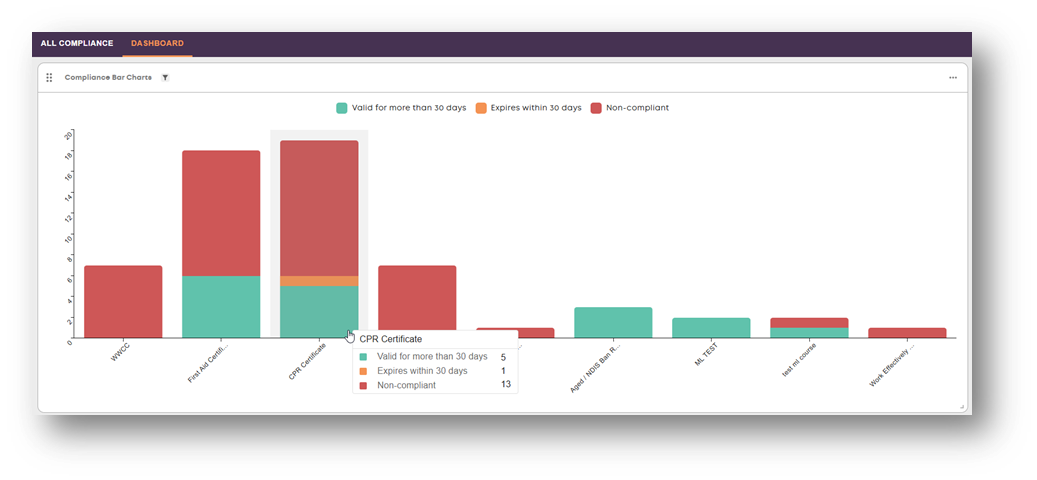
Step 13: Click on the Dashboard to view visual bar graphs of your compliance health (e.g., checking the CPR Certificate bar).
Step 14: Click directly into any compliance bar graph to view a detailed breakdown of statuses:
- Compliant: Employees clear for more than 30 days.
- Upcoming Expiry: Employees expiring within 30 days.
- Non-Compliant: View the exact cause of non-compliance (e.g., identifying who has been sent the item but hasn't uploaded it vs. who belongs to a mandatory role but hasn't been sent the item yet).